【流程中心】前端流程设计器的实现
技术选型
其实这个流程中心是不强依赖于组件库的,比较随意,但是因为公司要求,所以这里就使用 Vue3 + TS + AntDesgin。
前端就直接使用
https://github.com/vbenjs/vue-vben-admin
了,各位兄弟们可以自行下载。git clone、 pnpm install、pnpm vite 后就可以 crud 了。
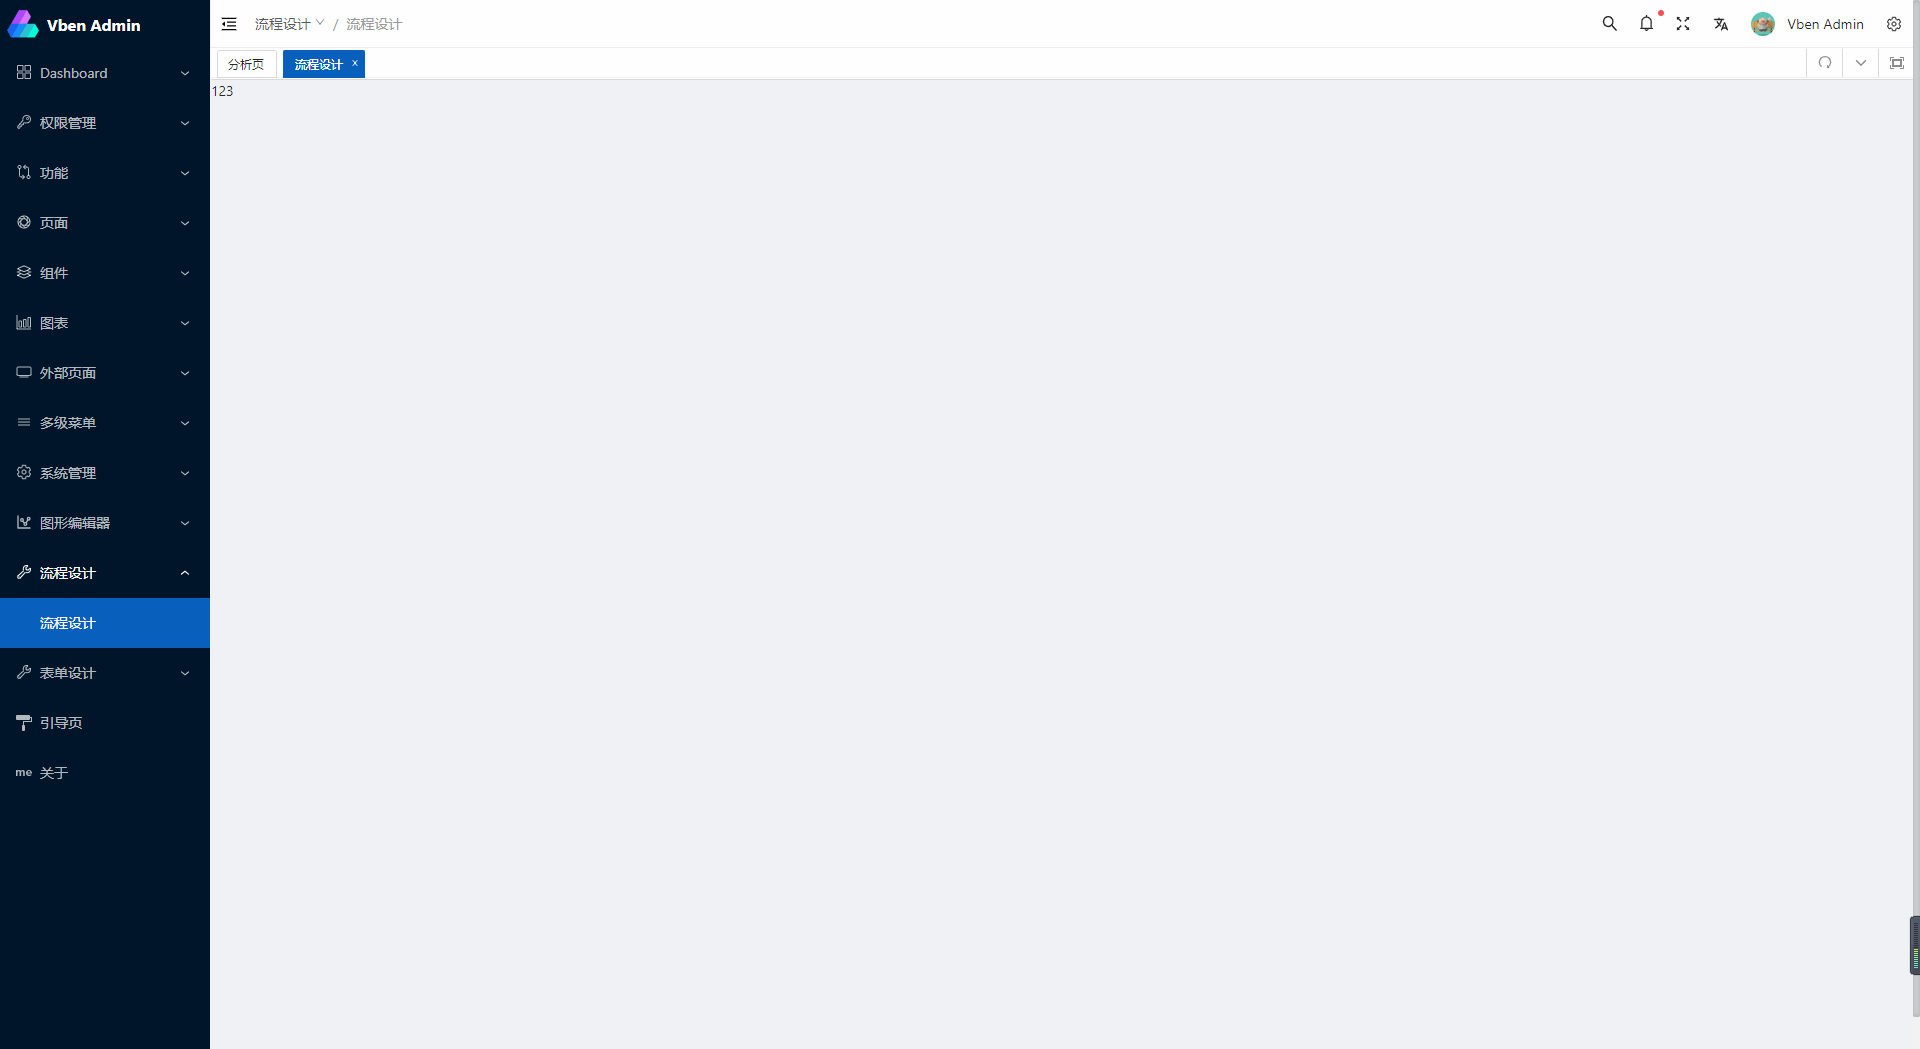
运行之后就是这个样子,万里长征第一步好了!

新建系统菜单
具体就是在src/router/routes/modules/ 新建文件夹 flw 文件夹并新建 main.ts 文件,具体路径可参考 src/router/routes/modules/flw/main.ts
import type { AppRouteModule } from '/@/router/types';

import { LAYOUT } from '/@/router/constant';

const permission: AppRouteModule = {
  path: '/flw-designer',
  name: 'flw-designer',
  component: LAYOUT,
  meta: {
    orderNo: 10000,
    icon: 'ion:build-outline',
    title: '流程设计',
  },
  children: [
    {
      path: 'flwDesign',
      name: 'FlwDesign',
      meta: {
        title: '流程设计',
      },
      component: () => import('/@/views/flw-design/index.vue'),
    },
  ],
};

export default permission;
新建页面
具体就是在 src/views/ 新建文件夹 flw-design 文件夹并新建 index.vue 文件,具体路径可参考 src/views/flw-design/index.vue
<template>
  <p>123</p>
</template>

<script lang="ts" setup></script>

<style lang="less" scoped></style>
刷新页面后看到内容则代表新建完成

组件注册
vben 默认没有全局注册所有的 antDesgin 组件,我用起来很不舒服,所以先参考
https://doc.vvbin.cn/guide/component.html#%E5%85%A8%E5%B1%80%E6%8C%89%E9%9C%80%E6%B3%A8%E5%86%8C
对组件进行注册。src/components/registerGlobComp.ts
import {
  // Need
  Button,
  Select,
  Alert,
  Checkbox,
  DatePicker,
  Radio,
  Switch,
  Card,
  List,
  Tabs,
  Descriptions,
  Tree,
  Table,
  Divider,
  Modal,
  Drawer,
  Dropdown,
  Tag,
  Tooltip,
  Badge,
  Popover,
  Upload,
  Transfer,
  Steps,
  PageHeader,
  Result,
  Empty,
  Avatar,
  Menu,
  Breadcrumb,
  Form,
  Input,
  Row,
  Col,
  Spin,
} from 'ant-design-vue';

export function registerGlobComp(app: App) {
  app
    .use(Button)
    .use(Select)
    .use(Alert)
    .use(Breadcrumb)
    .use(Checkbox)
    .use(DatePicker)
    .use(Radio)
    .use(Switch)
    .use(Card)
    .use(List)
    .use(Descriptions)
    .use(Tree)
    .use(Table)
    .use(Divider)
    .use(Modal)
    .use(Drawer)
    .use(Dropdown)
    .use(Tag)
    .use(Tooltip)
    .use(Badge)
    .use(Popover)
    .use(Upload)
    .use(Transfer)
    .use(Steps)
    .use(PageHeader)
    .use(Result)
    .use(Empty)
    .use(Avatar)
    .use(Menu)
    .use(Tabs)
    .use(Form)
    .use(Input)
    .use(Row)
    .use(Col)
    .use(Spin);
}
主页面编写
先对页面进行简单的抽象,前面提到过流程设计器的核心就是递归,其实还有抽屉。这个我们后面再说,看代码注释可以知道,这个主页面很少东西,主要就是设置一下背景以及引用组件,这里还对组件配置进行了抽象,后端同学对这个比较熟悉,无非就是定义 DTO 嘛。
<template>
  <!-- 编辑区域 -->
  <div class="editor-content">
    <!-- 节点内容 -->
    <div class="box-scale">
      <node-wrap v-model:nodeConfig="nodeConfig" />

      <!-- 结束节点为固定最后一个节点 -->
      <div class="end-node">
        <div class="end-node-circle"></div>
        <div class="end-node-text">流程结束</div>
      </div>
    </div>
  </div>
</template>

<script lang="ts" setup>
  import { onMounted, ref } from 'vue';
  import NodeWrap from '@/components/common/nodeWrap.vue';
  import {
    NodeConfig,
    START_EVENT,
    USER_TASK,
    SERVICE_TASK,
    EXCLUSIVE_GATEWAY,
  } from '@/components/common/nodeWrap';

  let nodeConfig = ref<NodeConfig>({});

  onMounted(() => {
    // 初始化
    nodeConfig.value = {
      id: 'root',
      nodeName: '开始节点',
      type: START_EVENT,
      childNode: {
        id: 'test1',
        nodeName: '审批节点1',
        type: USER_TASK,
        childNode: {},
        conditionNodes: [],
      },
      conditionNodes: [],
    };
  });
</script>

<style scoped>
  .editor-content {
    width: 100%;
    height: 100%;
    background-color: #f5f5f7;
    padding-bottom: 30px;
  }

  .end-node {
    border-radius: 50%;
    font-size: 14px;
    color: rgba(25, 31, 37, 0.4);
    text-align: left;
  }

  .end-node-circle {
    width: 10px;
    height: 10px;
    margin: auto;
    border-radius: 50%;
    background: #dbdcdc;
  }

  .end-node-text {
    margin-top: 5px;
    text-align: center;
  }
</style>
数据类编写
这个类就是对应后端的 DTO,就是将组件需要的数据抽象一下,以及定义了一些常量,目前还比较少,随着项目不断完善会越来越多。看注释就能理解这些是什么意思。
src/components/common/nodeWrap.ts
// 节点配置
interface NodeConfig {
  // 节点的唯一 id,后面使用 uuid 来生成
  id: String;
  // 节点的名称
  nodeName: String;
  // 节点的类型,与下方常量对应
  type: String;
  // 节点的子节点
  childNode: NodeConfig;
  // 条件节点的条件列表
  conditionNodes: NodeConfig[];
  // 条件节点的优先级
  priorityLevel: Number;
}

// 开始节点
const START_EVENT = 'startEvent';
// 审批人节点
const USER_TASK = 'userTask';
// 抄送节点
const SERVICE_TASK = 'serviceTask';
// 排他网关节点
const EXCLUSIVE_GATEWAY = 'exclusiveGateway';
// 派发网关条件节点
const SEQUENCE_FLOW = 'sequenceFlow';

export { START_EVENT, USER_TASK, SERVICE_TASK, EXCLUSIVE_GATEWAY, SEQUENCE_FLOW, type NodeConfig };
节点组件编写
这个是最核心的类,定义了流程编辑器的内容,其中包含了节点类型、节点样式、交互逻辑等,目前还没有编写样式,只是简单的做了逻辑上的功能,注释很详细不用担心看不懂。
src/components/common/nodeWrap.vue
<template>
  <div class="node-wrap" v-if="[START_EVENT, USER_TASK, SERVICE_TASK].includes(nodeConfig.type)">
    <!-- 审批、抄送节点 -->
    <a-card hoverable size="small" class="node-wrap-box">
      <template #title>
        <span>{{ nodeConfig.nodeName }}</span>
      </template>
      <template #extra>
        <span v-if="nodeConfig.type !== START_EVENT" @click="handleDeleteNode">
          <CloseOutlined />
        </span>
      </template>
      <div @click="handleNodeEvent">
        <div class="text">
          <!-- 占位显示内容 -->
          <span class="placeholder" v-if="!nodeTitle">请选择{{ defaultTitle }}</span>
          {{ nodeTitle }}
        </div>
        <i class="anticon anticon-right arrow"></i>
      </div>
    </a-card>
    <!-- 增加节点的按钮 -->
    <add-node v-model:childNodeItem="nodeConfig.childNode" />
  </div>

  <!-- 排他网关节点 -->
  <div v-if="nodeConfig.type === EXCLUSIVE_GATEWAY">
    <a-button @click="handleAddTermNode">添加条件</a-button>
    <div v-for="(item, index) in nodeConfig.conditionNodes" :key="index">
      <a-card hoverable size="small" class="node-wrap-box">
        <template #title>
          <span>{{ item.nodeName }}</span>
        </template>
        <template #extra>
          <span @click="handleDeleteTermNode">
            <CloseOutlined />
          </span>
        </template>
        <div @click="handleNodeEvent">
          <a-row>
            <a-col :span="1">
              <span @click="handleNodeShift(index, -1)"><</span>
            </a-col>
            <a-col :span="22" align="center">
              <span>请选择{{ defaultTitle }}</span>
            </a-col>
            <a-col :span="1" align="right">
              <span @click="handleNodeShift(index, 1)">></span>
            </a-col>
          </a-row>
        </div>
      </a-card>
      <addNode v-model:childNodeItem="item.childNode" />

      <nodeWrap v-if="item.childNode" v-model:nodeConfig="item.childNode" />
    </div>
  </div>
  <!-- 子节点 -->
  <nodeWrap v-if="nodeConfig.childNode" v-model:nodeConfig="nodeConfig.childNode" />
</template>

<script lang="ts" setup>
  import {
    NodeConfig,
    EXCLUSIVE_GATEWAY,
    SEQUENCE_FLOW,
    SERVICE_TASK,
    START_EVENT,
    USER_TASK,
  } from '@/components/common/nodeWrap';
  import { computed, PropType } from 'vue';
  import AddNode from '@/components/common/AddNode.vue';

  import { CloseOutlined } from '@ant-design/icons-vue';

  const props = defineProps({
    nodeConfig: {
      type: Object as PropType<NodeConfig>,
      default: () => ({}),
    },
  });

  let emits = defineEmits(['update:nodeConfig']);

  let placeholderList = {
    START_EVENT: '发起人',
    USER_TASK: '审批人',
    SERVICE_TASK: '抄送人',
  };

  let defaultTitle = computed(() => {
    return placeholderList[props.nodeConfig?.type];
  });

  let nodeTitle = computed(() => {
    return '默认标题';
  });

  const handleNodeEvent = (priorityLevel) => {
    var { type } = props.nodeConfig;
    if (START_EVENT === type) {
      // TODO 当节点为开始事件时
    } else if (USER_TASK === type) {
      // TODO 当节点为审批人时
    } else if (SERVICE_TASK === type) {
      // TODO 当节点为抄送人时
    } else if (EXCLUSIVE_GATEWAY === type) {
      // TODO 当节点为排他网关时
    }
  };

  const handleDeleteNode = () => {
    // 将子节点作为当前节点,作用就是删除当前节点,链式列表思想
    emits('update:nodeConfig', props.nodeConfig.childNode);
  };

  /**
   * 添加排他网关
   */
  const handleAddTermNode = () => {
    let len = props.nodeConfig?.conditionNodes.length + 1;
    props.nodeConfig?.conditionNodes.push({
      id: '',
      nodeName: '条件' + len,
      type: EXCLUSIVE_GATEWAY,
      priorityLevel: len,
      conditionList: [],
      childNode: null,
      conditionNodes: [],
    });
    emits('update:nodeConfig', props.nodeConfig);
  };

  /**
   * 移动排他网关条件
   */
  const handleNodeShift = (index, step) => {};

  /**
   * 删除排他网关条件
   */
  const handleDeleteTermNode = (index) => {};
</script>

<style lang="less" scoped></style>
添加节点组件
这个组件功能比较单一,只是用来新增节点的,目前做的比较随意,其实可以做成动态数据的,但是我比较懒,有需求的可以自己修改。
src/components/common/AddNode.vue
<template>
  <!-- 添加节点的容器 -->
  <div class="add-node-btn-box">
    <!-- 添加节点弹框内容 -->
    <div class="add-node-btn">
      <a-popover placement="rightTop" v-model="visible" width="auto">
        <template #content>
          <a-row style="width: 200px">
            <a-col :span="8" align="center">
              <a-button shape="circle" :size="'large'" @click="handleAddNode(USER_TASK)">
                <template #icon>
                  <UserOutlined />
                </template>
              </a-button>
              <p>审核人</p>
            </a-col>
            <a-col :span="8" align="center">
              <a-button shape="circle" :size="'large'" @click="handleAddNode(SERVICE_TASK)">
                <template #icon>
                  <SendOutlined />
                </template>
              </a-button>
              <p>抄送人</p>
            </a-col>
            <a-col :span="8" align="center">
              <a-button shape="circle" :size="'large'" @click="handleAddNode(EXCLUSIVE_GATEWAY)">
                <template #icon>
                  <ApartmentOutlined />
                </template>
              </a-button>
              <p>条件分支</p>
            </a-col>
          </a-row>
        </template>
        <a-button type="primary" shape="circle" :size="'large'">
          <template #icon>
            <PlusOutlined />
          </template>
        </a-button>
      </a-popover>
    </div>
  </div>
</template>
<script setup lang="ts">
  import { ref } from 'vue';
  import {
    USER_TASK,
    SERVICE_TASK,
    EXCLUSIVE_GATEWAY,
    SEQUENCE_FLOW,
  } from '@/components/common/nodeWrap';

  import {
    PlusOutlined,
    UserOutlined,
    ApartmentOutlined,
    SendOutlined,
  } from '@ant-design/icons-vue';

  let props = defineProps({
    childNodeItem: {
      type: Object,
      default: () => ({}),
    },
  });

  let emits = defineEmits(['update:childNodeItem']);
  let visible = ref(true);

  const getRandomId = () => {
    return `node_${new Date().getTime().toString().substring(5)}${Math.round(
      Math.random() * 9000 + 1000,
    )}`;
  };

  const handleAddNode = (type) => {
    visible.value = false;
    var data;
    if (USER_TASK === type) {
      data = {
        id: getRandomId(),
        nodeName: '审核人',
        type: USER_TASK,
        childNode: props.childNodeItem,
      };
    } else if (SERVICE_TASK === type) {
      data = {
        id: getRandomId(),
        nodeName: '抄送人',
        type: SERVICE_TASK,
        childNode: props.childNodeItem,
      };
    } else if (EXCLUSIVE_GATEWAY === type) {
      data = {
        id: getRandomId(),
        nodeName: '路由',
        type: EXCLUSIVE_GATEWAY,
        childNode: null,
        conditionNodes: [
          {
            id: getRandomId(),
            nodeName: '条件1',
            error: true,
            type: SEQUENCE_FLOW,
            childNode: props.childNodeItem,
          },
          {
            id: getRandomId(),
            nodeName: '条件2',
            type: SEQUENCE_FLOW,
            childNode: null,
          },
        ],
      };
    }
    emits('update:childNodeItem', data);
  };
</script>
<style scoped lang="less">
</style>
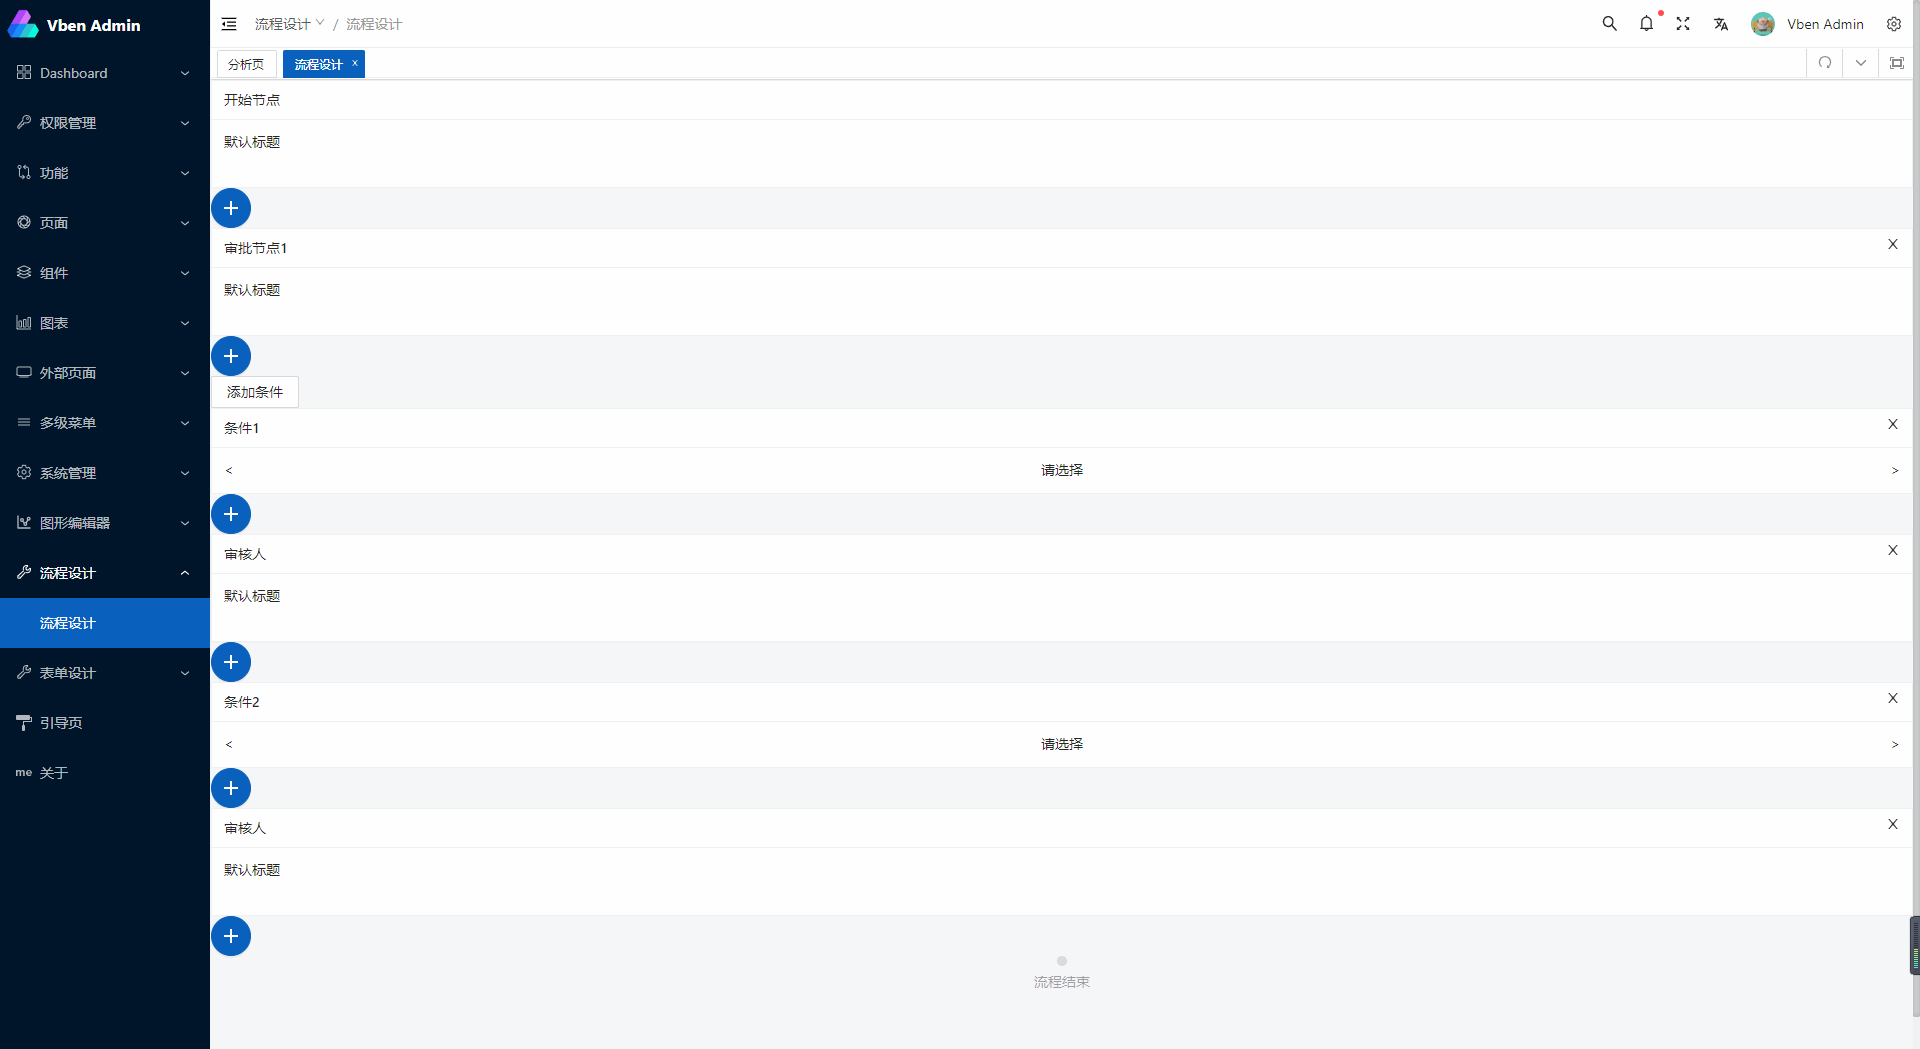
效果


😳 我去,最近帖子都这么硬的么?